
Table Saw Miter Gauge Accuracy: When It Works & When a Sled Is Better
INFO
Evidence Level: Level 0 — Theory Lab
This article explains table saw miter gauge accuracy using mechanical principles, common setup methods, and crosscut workflow analysis. It does not claim physical test results for any specific miter gauge or table saw model.
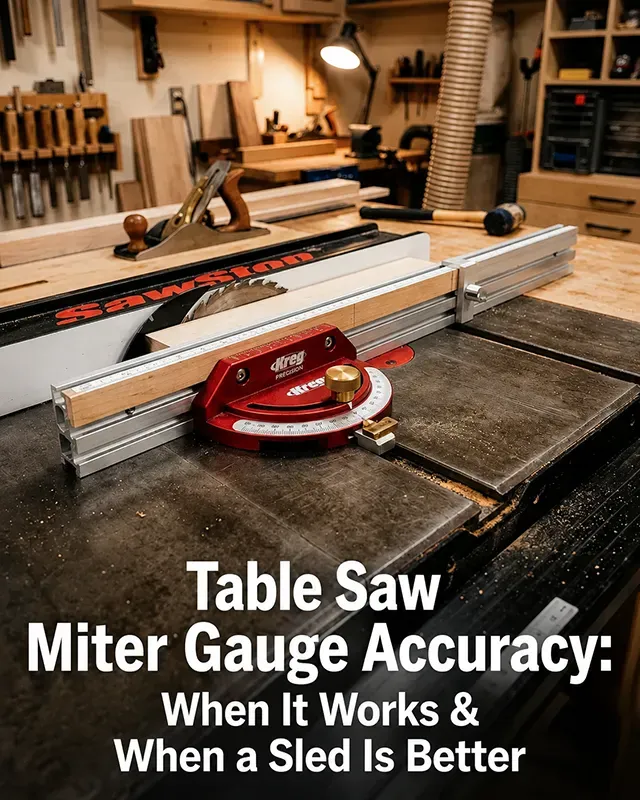
Almost every table saw comes with a standard table saw miter gauge, but many factory gauges end up collecting dust because they feel loose, short, or unreliable during crosscuts. The immediate reaction is usually to look at the aftermarket. There are plenty of premium options available, promising dead-on accuracy and rigid support.
But before spending money on an upgrade, it helps to look at the mechanical forces at play during a crosscut. Understanding where a factory gauge loses accuracy will tell you whether you actually need a better gauge, or if you just need to build a crosscut sled.
What a Table Saw Miter Gauge Actually Controls
To understand miter gauge accuracy, you have to look at how the tool interacts with the wood. When you use a miter gauge for table saw crosscuts, you are pushing the workpiece across a stationary table. The gauge pushes the wood from behind, but the bottom of the board is dragging against cast iron (or aluminum).
Friction itself acts opposite the feed direction, but because the operator pushes through a narrow gauge face while the board contacts the table over a larger area, uneven resistance can create a rotational tendency. If the board twists even slightly away from the gauge face during the cut, crosscut accuracy drops immediately.
This is the fundamental limitation of the miter-gauge workflow: the gauge can be precise, but the workpiece still has to slide across the table while staying registered against a relatively narrow fence.
Miter Slot Fit and Bar Play
The most obvious source of error in a factory gauge is the miter slot fit. The industry standard miter slot is 3/4” wide and 3/8” deep. However, manufacturing tolerances vary, especially across jobsite saws, older saws, and non-standard slots.
Because the head of the gauge extends outward, any lateral play in the bar multiplies the angular error at the blade. If you can wiggle the handle side-to-side while the gauge is sitting in the slot, reliable crosscut accuracy becomes difficult, especially on wider boards or repeat cuts.
Aftermarket gauges solve this mechanically. Most utilize expansion washers, split bars, or adjustable nylon set screws along the side of the miter bar. By adjusting these points, you can expand the effective width of the bar until it glides smoothly in the slot with zero lateral play.
How to Check Your Miter Gauge Before Upgrading
Before buying a replacement, diagnose your current setup:
- Insert the gauge into the slot and lock the head at 90°.
- Wiggle the handle side to side. If the head moves visibly, the bar has play.
- Push the gauge through the full travel. If it is tight in one area and loose in another, the slot or bar fit is inconsistent.
- Place a reliable square against the gauge face and blade body (not the carbide teeth).
- Make a test cut, flip one piece, and compare the two cut faces to amplify any square error.
When to Upgrade Your Miter Gauge
Once the bar fits the slot, the next point of failure is the protractor head. Factory gauges usually rely on a simple cast pin dropping into a cast detent for common angles like 0° (90° to the blade), 22.5°, and 45°. Over time, vibration and wear cause these detents to loosen. A sloppy angle stop means your 90-degree cut might actually be 89.5 degrees.
Precision aftermarket gauges bypass this by using V-tooth indexing or laser-cut locking plates. Instead of relying on a friction lock or a single pin, gear-tooth systems mesh dozens of teeth together simultaneously. This increases resistance to angular drift compared with a simple friction lock, especially when the gauge is used repeatedly at common angles.
Why an Auxiliary Fence Changes Crosscut Accuracy
A bare metal miter gauge head is usually only a few inches wide. It does not provide enough registration area to hold a board square, especially a long one. Adding an auxiliary fence is usually necessary for consistent results, especially when the workpiece is longer than the small factory gauge face. This can be a piece of flat MDF, plywood, or an extruded aluminum track bolted to the gauge.
An auxiliary fence does three things:
- It provides a long, straight registration edge to fight rotational torque.
- It supports the wood fibers directly behind the cut, reducing tear-out (see Table Saw Blades Explained for more on preventing tear-out).
- It allows you to use a stop block.
A stop block clamped to an auxiliary fence allows you to cut multiple pieces to the exact same length. If you are building a cabinet and need four rails that are exactly 18 inches long, measuring with a tape measure for each cut will result in slight variations. Pushing the wood against a fixed stop block ensures identical parts.
DANGER
Safety Note: A stop block should not trap the cutoff between the blade and the rip fence. If you use the rip fence to register repeat lengths, clamp a short standoff block to the fence before the blade so the workpiece is free before it reaches the cut. Never crosscut with the workpiece pinched between the blade and fence (read more in Table Saw Fence Accuracy).
Miter Gauge vs Crosscut Sled: Which Is Better?
If aftermarket gauges are so accurate, why do so many woodworkers rely on crosscut sleds? A crosscut sled fundamentally changes the mechanics of the cut. Because the workpiece moves with the sled surface, the board no longer has to slide directly across the saw table during the cut.
The rotational tendency that constantly tries to pull the wood away from a miter gauge face is practically eliminated. Additionally, a well-built sled uses both miter slots simultaneously, utilizing two runners. This creates a deeply rigid track that resists twisting forces far better than a single miter bar.
Making the Decision
Throwing away a stock, sloppy gauge is generally a good idea. But before spending heavily on a premium replacement, evaluate what you actually cut. Here is a quick guide to help you decide your next move.
Use a miter gauge when:
- You cut frequent angles.
- The stock is narrow enough to stay registered.
- You need a quick, lightweight setup.
- You use an auxiliary fence and stop block.
Use a crosscut sled when:
- You mostly cut 90° parts.
- You cut wide panels.
- You need highly repeatable cabinet parts.
- You cut small parts needing zero-clearance support.
- You want more support area and easier clamping.
Upgrade the miter gauge when:
- Your current bar has play you cannot adjust out.
- The angle head drifts during cuts.
- You need highly repeatable, precise miters.
- You want an integrated aluminum fence and flip stop system out of the box.
Build a sled first when:
- Your main problem is square crosscuts, not angled cuts.
- You primarily cut panels, rails, or small parts.
- Your saw has enough table space to handle a sled.
If your primary struggle is getting perfectly square ends on wide boards, building a sled is the correct mechanical solution. If you frequently cut precise angles for joinery, frames, trim, or polygon work, an upgraded miter gauge is the better investment. A table saw miter gauge is not a universal crosscut solution. It is an angle-control tool. A crosscut sled is a support-and-registration tool. Once you separate those two jobs, the upgrade decision becomes much easier.
For more guides on maximizing your saw’s performance, visit our Table Saw Knowledge Hub.