
Table Saw Sled Explained: Accuracy, Safety, and When to Build One
INFO
Evidence Level: Level 0 — Theory Lab + Method Explanation
This article explains table saw sled mechanics using woodworking principles and common setup methods. It does not claim physical test results for any specific sled design.
If you buy a new table saw, unbox it, and try to crosscut a wide board using the included miter gauge, you will likely notice a mechanical problem. The gauge wiggles slightly in the miter slot. The wood drags heavily against the cast iron. Keeping the board well registered against the small aluminum fence while pushing it forward requires constant, awkward pressure.
This mechanical friction is why the table saw sled exists.
A table saw sled—most commonly a crosscut sled—replaces the standard miter gauge entirely. Instead of sliding your workpiece across a stationary table, the workpiece rests on a platform that slides over the table. This simple shift changes the physics of the cut, altering how wood is supported and fundamentally changing workshop workflow.
What Is a Table Saw Sled Used For?
Before looking at the mechanics, it helps to define what a sled actually does in practice.
A table saw sled is primarily used for controlled crosscuts (cutting across the grain of the wood), making repeated square cuts to a consistent length, cutting small parts with better support, especially when paired with clamps or hold-downs, and handling awkward or wide workpieces that a standard miter gauge cannot stabilize. It is highly effective for breaking down small to medium plywood panels.
Push aids such as push sticks and push blocks are mainly ripping tools. For crosscuts, a sled supports and guides the workpiece through a different mechanical path, keeping the stock registered as it passes the blade.
It is important to note what it is not used for. A crosscut sled for a table saw is not a replacement for the rip fence. It should never be used for ripping long boards along their length, as the mechanics of a rip cut require continuous feed against a stationary parallel reference.
How a Table Saw Crosscut Sled Works
Understanding why a sled works better than a miter gauge comes down to friction and structural support.
When you use a miter gauge, the bottom of the wood drags across the table. If you apply uneven forward pressure, the wood can pivot slightly against the gauge, instantly changing your cut angle.
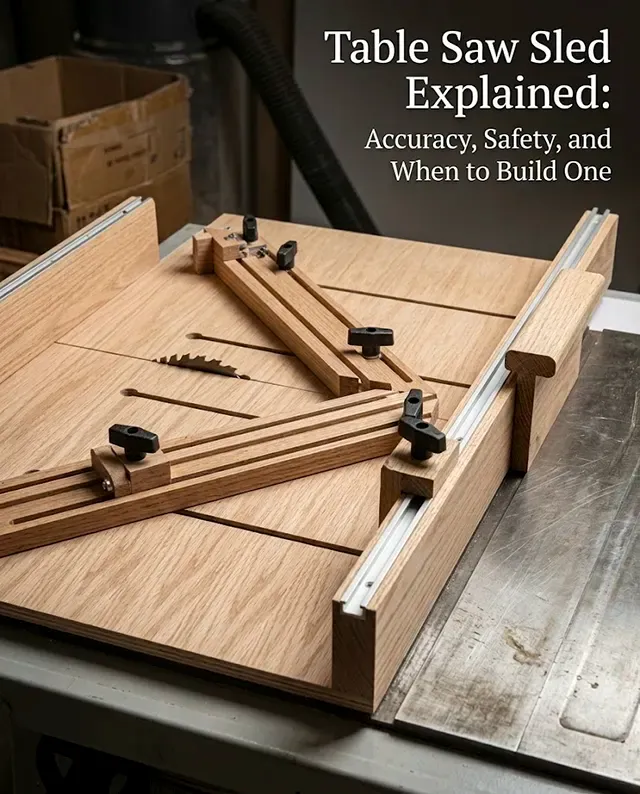
A table saw crosscut sled acts as a moving carriage. It consists of a flat base (usually plywood or MDF) with two runners permanently attached to the bottom that ride in the saw’s miter slots. A rigid rear fence is attached to the top of the base. You place the wood on the base, hold it against the fence, and push the entire carriage forward.
Because the wood travels with the base, direct sliding friction between the workpiece and the cast-iron table is largely removed. When held correctly, the workpiece remains stationary relative to the fence throughout the cut.
Why a Sled Can Be More Accurate Than a Miter Gauge
The accuracy of a sled comes from its two guided runners in the miter slots and its extended rear fence.
Standard miter gauges use a single steel bar. Even on high-end saws, there is often slight lateral play between that bar and the slot. A sled uses two runners, which can be tuned to fit both slots simultaneously. This dual-track system resists twisting forces much better than a single bar.
Furthermore, the rear fence on a sled is typically much longer than a miter gauge face. A longer fence provides a larger registration surface for the wood. The longer the reference edge, the harder it is for the workpiece to shift out of alignment during the feed.
Zero-Clearance Support and Tear-Out Control
The first time you push a newly built sled through the blade, the saw cuts a kerf directly through the base and the rear fence. This creates a zero-clearance slot that closely matches that blade’s path.
When the blade exits the back of your workpiece, the wood fibers are structurally supported by the sled’s rear fence. Similarly, the bottom of the workpiece is supported by the sled’s base. This backing can significantly reduce bottom and exit-side tear-out, especially when paired with a sharp blade matched to the material. It does not guarantee tear-out-free cuts in every difficult plywood or fragile veneer situation, but it can noticeably improve edge quality compared with an open throat plate and an unsupported miter gauge.
Table Saw Sled Safety: What It Helps With
DANGER
Safety Note: A crosscut sled can improve workpiece control during crosscuts, but it is not a substitute for blade guards, riving knives where applicable, push blocks, proper hand placement, and the manufacturer’s operating instructions.
Crosscutting on a table saw introduces specific kickback risks. If a board rotates away from the miter gauge and pinches the back of the blade, the rising teeth can grab the wood and throw it back at the operator.
A sled for a table saw mechanically restricts this movement. The long rear fence gives the workpiece a larger registration surface, which reduces the tendency for the board to rotate during the cut. It does not remove the need for controlled hand placement, a sharp blade, proper feed pressure, and strict attention to the blade exit path. Used correctly, the sled encourages your hands to stay behind the rear fence, away from the blade path. Many builders add a solid blade-exit block or guard over the rear fence to make this separation more obvious. For small parts, a clamp or hold-down is often safer than relying on finger pressure near the cut line.
It is critical to remember that you should never use your saw’s rip fence as a fixed stop block when using a sled, unless you clamp a standoff block well ahead of the blade. Trapping a cutoff between the spinning blade and a fixed rip fence can create a serious projectile risk.
What a Sled Does Not Fix
A sled is a precision carriage, but it cannot override the mechanical reality of your table saw.
A sled does not make a poorly aligned table saw accurate by itself. If the blade is meaningfully out of parallel with the miter slots, the sled will push the wood through the blade at a slight angle, causing burning, rough cuts, and binding. The runners must fit the slots without side play, and the blade must be correctly aligned to those slots before a sled can provide any accuracy benefits. The sled improves workpiece control, but the baseline accuracy still comes from your saw’s initial setup.
Types of Table Saw Sleds and Related Jigs
The standard crosscut sled is usually the first custom fixture woodworkers add to their shop, but the underlying carriage mechanism is highly adaptable. Different tasks require different setups.
- Standard Crosscut Sled: Built for heavy-duty 90-degree crosscuts and panel breaking. Building one typically follows standard table saw sled plans that outline runner installation and fence squaring.
- Small-Parts Sled: A scaled-down version designed specifically for handling short pieces that are unsafe or awkward to hold against a miter gauge.
- Miter Sled: Built with a fixed 45-degree fence, or adjustable fences, for cutting perfectly matched picture frames and angled joinery.
- Panel Sled: Usually a larger support platform, sometimes built with a single runner, used for squaring panels or supporting wider workpieces.
- Taper Sled / Taper Jig: Holds the workpiece at an angle while the jig travels in a straight path. A table saw taper jig applies sled-style control to tapered legs, angled furniture parts, and long wedge-shaped cuts where the cut line is not parallel to the reference edge.
Once you understand how to install runners and a base, you can explore other fixtures. For instance, if you are looking to cut joinery, you will likely move from a flat crosscut sled to a dedicated table saw tenon jig, which relates mechanically but holds the wood vertically to cut cheeks and shoulders securely. For a broader look at how carriages and fixtures can modify your saw’s capabilities, review our breakdown of essential table saw jigs.
When a Table Saw Sled Makes Sense
Build or buy a sled if you often crosscut boards wider than your miter gauge can safely support, need highly repeatable square cuts, cut small parts frequently, work with plywood panels, or want a dedicated zero-clearance setup for cleaner crosscuts.
You may not need one immediately if you mostly rip lumber, rely on a high-quality sliding miter saw for all your crosscuts, or only make occasional rough cuts where final squaring happens later in your workflow.
Tradeoffs of Using a Sled
While the benefits are significant, a table saw sled introduces a few mechanical compromises:
- Loss of Cut Capacity: The base of the sled consumes vertical space. If you build a sled with a 1/2-inch or 3/4-inch plywood base, you permanently lose that much maximum cutting depth from your saw blade.
- Weight and Storage: A well-built sled made from Baltic birch plywood and heavy hardwood fences is heavy. Lifting it onto the saw requires effort, and finding a place to store it vertically without warping the base can be frustrating in a small shop.
- Runner Expansion: If you use hardwood runners, seasonal changes in workshop humidity can cause the wood to swell, making the sled stick in the miter slots. Many owners eventually upgrade to UHMW plastic or adjustable aluminum runners for smoother year-round travel.
Should You Build or Buy a Crosscut Sled?
Because achieving precise 90-degree accuracy requires careful calibration—usually achieved through the 5-cut method, which magnifies small fence-alignment errors so they can be measured and corrected more precisely—many woodworkers debate whether to construct their own or purchase a manufactured option.
Factory-built sleds offer adjustable aluminum fences, smooth-gliding miter bars, and precise angle stops out of the box. However, they cost significantly more, and some do not provide the same blade-specific zero-clearance slot you get from a custom sled built on your own saw. If you are deciding which route makes sense for your shop’s budget and workflow, our guide on crosscut sleds: build or buy breaks down the long-term cost, precision, and maintenance tradeoffs.
Where to Go Next
If you decide that a custom build fits your needs, the process requires patience but utilizes materials you likely already have in the shop. Understanding the construction order will help you build a reliable workshop fixture that improves crosscut control, repeatability, and setup consistency.