Push Stick vs Push Block: Table Saw Control, Grip, and Safety
INFO
Evidence Level: This article is based on manufacturer safety documentation, table saw safety guidance, and mechanical analysis of workpiece control forces. It does not claim hands-on testing of a specific push stick or push block.
Every table saw user eventually confronts the same mechanical problem: how to move a piece of wood past a spinning blade without putting their hands in danger.
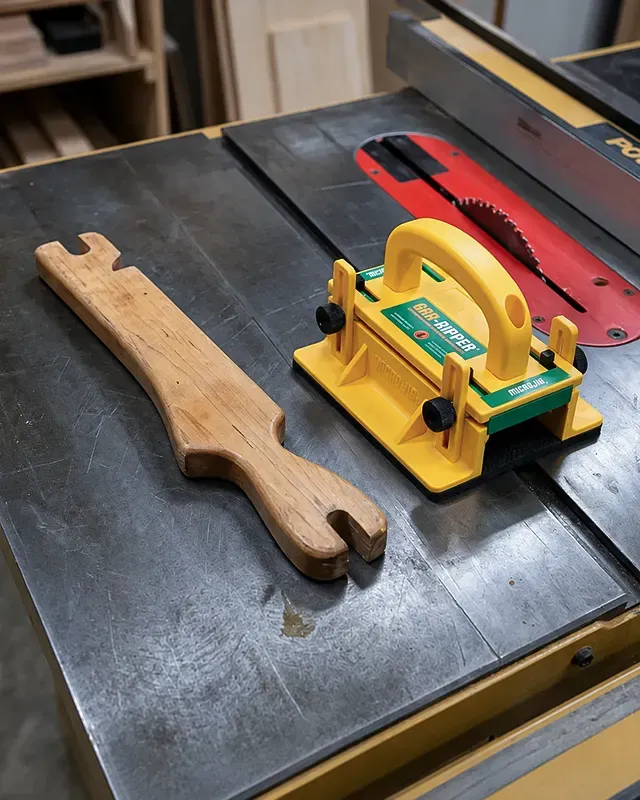
For decades, the standard answer has been the push stick—often a piece of scrap wood with a notch cut into the end. More recently, friction-based push blocks and straddle-style grips have become common in small shops.
Choosing between a push stick and a push block is not just a matter of preference. They operate on completely different mechanical principles, applying force in different ways, and leaving you exposed to different types of failure. To understand which to use, we need to look at how force is distributed during a cut.
The Three Directions of Force
To keep a rip cut controlled, the operator has to manage force in three directions:
- Forward: To advance the wood through the blade.
- Inward: To keep the wood registered firmly against the rip fence.
- Downward: To keep the wood flat on the table and prevent it from lifting into the rear teeth.
If any of these three forces fail, the cut becomes unstable. The exact tool matters because different aids are better at different parts of this force triangle.
The Push Stick: Distance Over Control
The fundamental advantage of a push stick is distance. It allows you to control the trailing end of a board near the end of a rip cut while keeping your hand farther away from the cutting path.
Mechanical Strengths
Push sticks excel in clearance. When the space between the blade and fence is too narrow for a push block to sit flat, a thin push stick or a manufacturer-approved narrow-rip aid may be the only device that fits. The exact cutoff depends on the saw, guard setup, and accessory instructions.
Because they are often made of scrap wood or soft plastic, they are designed to take damage. If the blade contacts the stick, the accessory is sacrificial; it should be replaced rather than reused after damage.
Mechanical Limitations
The primary flaw of a standard push stick lies in its inability to apply meaningful downward pressure across the whole board.
When you use a basic “bird’s mouth” stick (a stick with a notch at the back), your downward and forward forces are concentrated at the extreme trailing edge of the workpiece. This creates a pivot point. If the wood has internal tension and begins to bow upward, or if the rising teeth at the back of the blade catch the wood, a rear-placed push stick provides little direct control over the front of the board.
When the board lifts or twists, it can lose stable registration against the table and fence. The board can then pivot into the back of the blade, which is the primary catalyst in table saw kickback mechanics. A shoe-style push stick (which has a longer flat bottom) improves downward pressure somewhat, but it still relies on a single, narrow point of contact.
The Push Block: Surface Area and Friction
A push block relies on a high-friction material—usually a proprietary rubber or polymer pad—to grip the top surface of the workpiece. Instead of pushing the wood from the back edge, you apply force directly to the top face.
Mechanical Strengths
Because your hand is positioned above the center of the workpiece rather than behind it, a push block allows you to apply more evenly distributed downward pressure. This can help keep thin or slightly uneven stock flatter against the table, provided the block has enough clean surface area to grip.
Inward pressure is also easier to manage. Because the friction pad grips a large surface area, a slight inward feed vector can help keep the board registered against the fence. The pressure should be controlled, not excessive.
Some straddle-style push blocks take this a step further. They are designed to bridge the blade path with adjustable legs, allowing pressure to be applied to the keeper piece and, in some setups, the offcut. Controlling the offcut can reduce the chance that it drifts into the rear teeth, but the setup must follow the accessory manual and the saw’s guarding limitations.
Mechanical Limitations
Push blocks require enough clean, flat surface area to grip. If the board is too narrow, dusty, wet, rough, or uneven for the pad to seat properly, the block may not provide reliable control.
Furthermore, push blocks change your hand position. Some push blocks place the operator’s hand closer to the blade path than a long push stick does. The block is a barrier only when it is used within its rated configuration, with the blade height and adjustable legs set according to the accessory instructions. If the blade is raised too high or the block is misconfigured, the safety margin can disappear.
Finally, some push blocks, especially straddle-style designs, may conflict with standard over-blade guards because they need access to the top of the workpiece near the blade path. That does not mean the guard should be removed casually. The operator should follow the saw manual and the push block instructions, and use a different aid or setup when the guard must remain in place.
Not a Substitute for the Guarding System
A push stick or push block does not replace the saw’s guarding system. For normal through cuts, the blade guard, riving knife or splitter, anti-kickback pawls, and rip fence setup still matter. A push aid only changes how your hand applies force to the workpiece. It does not make a poor setup safe, and it does not prevent every kickback pathway.
Which Should You Use?
There is no single correct answer, as the right tool depends entirely on the operation.
A push stick is best when:
- The space beside the blade is too narrow for a push block to sit flat, and the saw or accessory manual allows a push stick or narrow-rip aid for that cut.
- You need more hand distance from the blade path while completing the final part of a rip cut.
- You are working with rough lumber or dusty/uneven stock where a friction pad cannot get a solid grip.
A push block is best when:
- You are ripping material wide enough for the pad to seat cleanly, especially stock that needs more downward control.
- You are using a controlled jig-based operation where the push block is approved for the setup.
- You are using a straddle-style block configured to control both the keeper piece and the offcut according to the accessory manual.
For crosscuts, neither tool is generally appropriate. Use a miter gauge or a dedicated table saw sled to control the work, and do not freehand crosscut on a table saw.
Understanding the mechanical forces at play allows you to choose the tool that actually solves the problem in front of you, rather than just reaching for the closest piece of notched scrap wood.
Frequently Asked Questions
Is a push block safer than a push stick? Not always. A push block usually gives better downward pressure and surface grip when the board is wide enough, while a push stick gives more distance and fits narrow rips better. The safer choice depends on the cut, the guard setup, and the accessory instructions.
Can I use a push block with the blade guard? Sometimes, but not always. Some push blocks fit beside a guard, while straddle-style blocks often conflict with over-blade guards. Follow the saw manual and the push block instructions rather than removing the guard by default.
When should I use a push stick? Use a push stick when the cut requires keeping your hand away from the blade path, especially near the end of a rip cut or when the space between the blade and fence is too narrow for a push block to sit flat.